When I started brainstorming my list of dishes to freeze before the baby comes, enchiladas were one of the first new things I added.
I’ve frozen lasagna and taquitos before, so those were naturally at the top of my entrees list.
Enchiladas came immediately after. We love our tacos, and they are in a regular rotation on our menu, but enchiladas often have very similar flavor profiles to tacos.
And while I could easily freeze some taco filling, it is going to be easier to reheat frozen enchiladas than it will be to assemble tacos when we’re taking care of a newborn (and probably less messy to eat one-handed, as well!). So I got to experimenting.
I couldn’t decide whether or not I needed to leave off the enchilada sauce before freezing. I was a little worried that the acidity of the tomato-based sauce would eat away at the aluminum foil, or that the sauce would pick up a “tinny” flavor in the freezer.
@slo_cooker Freezing leftovers from big batch recipes like enchiladas is a treat thag future you will thank past you for. Full recipe for these Chipotle Enchiladas is up on my blog! #food #cookingtricks #cookinghacks #leftovers #tiktokcooks #cooksoftiktok #enchiladas #mexicanfood #yummy #yummyfood #delish #delicious #deliciousfood #cooking #cookingtiktok #cookingtips ♬ Lazy Sunday – Official Sound Studio
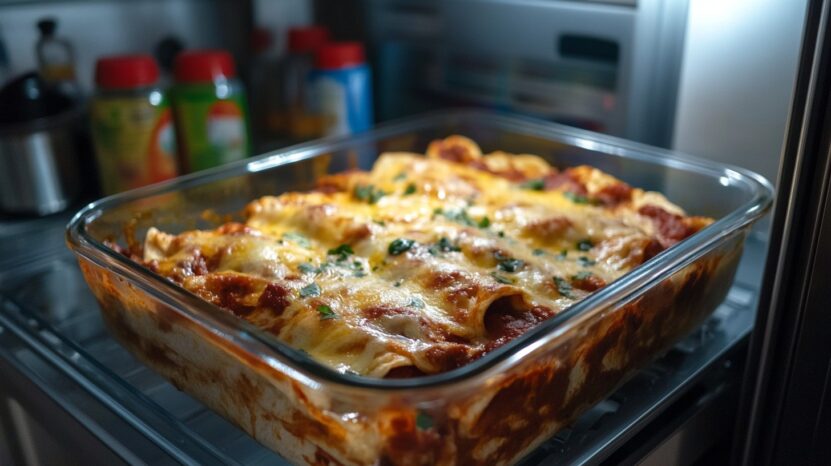
So I tested two freezing methods, and froze half the enchiladas with sauce, and half without. Before I reheated the dish, I added enchilada sauce to the other half, and topped both sides with cheese.
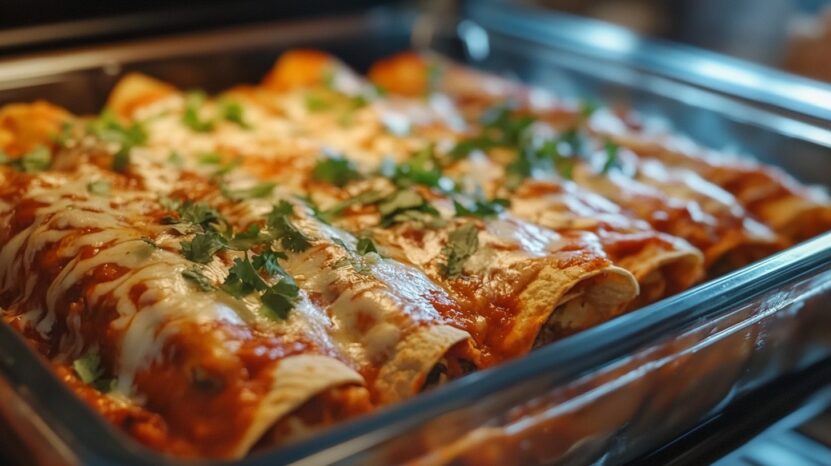
I definitely recommend freezing the enchiladas without any of the cheese that goes on top if you can. Cheese has a tendency to separate during freezing, so you could end up with a watery mess when you reheat them later. It only takes a few minutes to add shredded cheese before you cook up the enchiladas, and as a bonus, the cheese will brown more nicely if it wasn’t frozen first.

I did notice that the sauce separated a bit in the freezer, and developed some ice crystals that I didn’t see on the enchiladas that were frozen without sauce. It wasn’t a huge deal, and it wasn’t particularly noticeable after baking.
I could see it becoming more of a problem as more ice develops if you freeze the enchiladas for a longer period of time. Plus, there was a faint metallic taste to the sauce that had been frozen, which likely has to do with the interaction between the aluminum foil and acidic enchilada sauce. In the end, I think I’d prefer to freeze any future enchiladas without sauce, and then just add it right before baking.

You have a few options for storage materials here. I’ve outlined each below.
1. Disposable aluminum pans
These can be nice because they hold their shape well and are easy to use. However, if you are freezing a lot of meals, the cost can add up.
2. Glass, ceramic or metal baking pans
These are great because they involve no garbage – no foil or disposable pans to get rid of after you’ve baked up your frozen dish.
If you freeze enchiladas in your regular reusable baking pans, it means that those pans aren’t available for cooking other dishes for as long as your enchiladas are in the freezer.
3. Line a glass or ceramic baking pan with aluminum foil
This is the method I typically use. It is far cheaper than buying a bunch of disposable pans, and keeps my glass baking dishes free for cooking other recipes.
To freeze enchiladas this way, line your pan with aluminum foil before you fill it with your rolled enchiladas.
How to Freeze Enchiladas
Regardless of which storage materials you use to freeze your enchiladas, here’s how to do it:
1. Roll up your enchiladas
Prepare the filling and assemble the enchiladas as directed, but don’t top with any cheese just yet – it will separate when it freezes, and won’t brown as well when you reheat your enchiladas.
If you plan to freeze these for more than a few weeks and are using aluminum pans or foil, you may want to leave off the enchilada sauce as well, or it could take on a metallic taste over time.Bake at 350°F for 7-10 minutes. Allow to cool completely.
2. Freeze your enchiladas
When the enchiladas are completely cooled, cover your enchiladas, pressing out as much air as possible. Be sure to label the dishes with what they are, when they were made and how to reheat them.
If you are using disposable aluminum pans or your regular baking pans without foil: Press a piece of plastic wrap against the surface of the enchiladas, then cover with a lid or piece of foil. Freeze.
If you are lining a pan with aluminum foil: Cover the enchiladas with another piece of foil and pinch the edges of the top piece together with the edges of the bottom piece to create a packet, squeezing out the air as you go. Slide the entire pan in the freezer.
When the enchiladas are frozen solid, lift the foil packet out of the pan and leave just the packet in the freezer. Now your pan is free to use again!
Cooking Instructions:
Preheat your oven to whatever temperature your recipe calls for. While the oven heats up, remove the foil and plastic wrap from the top of the enchiladas, and top with enchilada sauce and cheese as directed.
Bake as directed in your recipe, but add 5 minutes to the baking time.
- NOTE: If you are using glass or ceramic pans, stick them in the cold oven before you turn on the heat.
That way, the pans can gradually heat up and won’t crack from the shock of a big temperature change! Just add a few additional minutes to your baking time to adjust for the slow warm-up.
Pro Tip: For other ways to preserve fresh ingredients, discover how to freeze chives and keep their flavor intact for your recipes.Final Words
Freezing enchiladas is a fantastic way to prepare a delicious meal ahead of time, perfect for those busy days when you just don’t have the time or energy to cook from scratch.
Through my experiments, I’ve found that freezing enchiladas without the sauce and cheese yields the best results, preserving the taste and texture of the dish.
Whether you choose to use disposable aluminum pans, your regular baking pans, or the aluminum foil lining method, the convenience of having a ready-to-bake meal in your freezer cannot be overstated. Especially when that meal is as comforting and satisfying as enchiladas!